FS5000 – Is This The Ultimate Budget Geiger Counter?

FS5000 – Is This The Ultimate Cheap Geiger Counter?

Welcome back my fellow radiation nerds! Today we are taking a closer look at the FS5000 meter and whether it is the ultimate budget Geiger counter!

If you enjoy this content make sure to subscribe so you dont miss any of the upcoming uploads. Thanks and now back to the video!

For a very long time I had a serious problem with answering one of the most common question in the field of amateur nuclear physics: “Which cheap geiger counter, would I recommend?”.

On one hand, there are plenty of cheap Chinese meters but in most cases they are honestly of very low quality. They suffer from low measuring range, slow averaging time and bad GM tubes that are not sensitive and can be prone to UV pollution.

On the other hand, there are professional devices such the SE International Radiation Alert Ranger which are absolutely fantastic, but they cost almost 10x what the cheap Chinese meters do and they are hard to recommend to someone who is just starting out, even if these meters are definitely worth their price.

So the question is: is there a budget friendly meter that can be bough brand new and that performs decently? Well, the Bosean FS5000 might be just the right answer!

FS5000 – Overview

The FS5000 is very budget friendly geiger counter produced by Bosean. While they are available on Amazon for around 70-80 Euro, I would recommend picking one up from the official Bosean AliExpress store site as they are a bit cheaper there, usually costing around 50 Euro and the only big downside is that delivery will take a few day longer.

Link to the Bosean AliExpress store: CLICK HERE

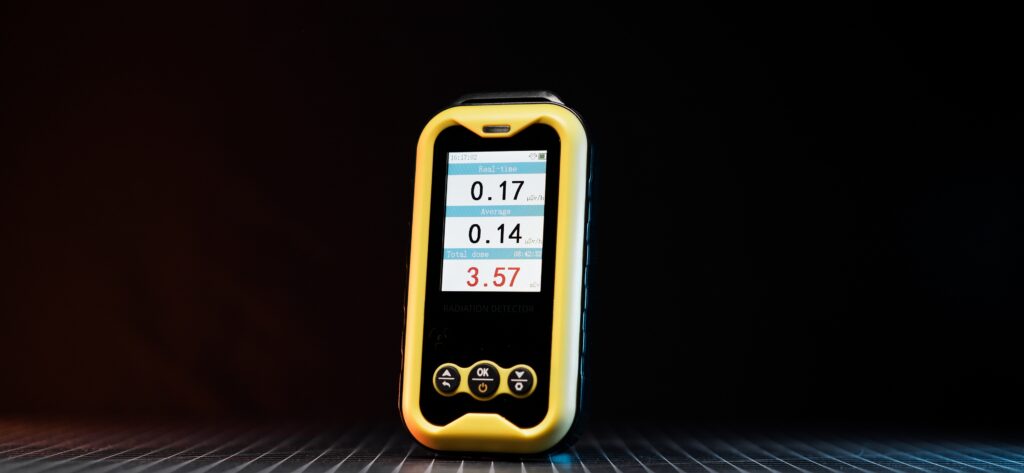
The meter has a very simple design which I really like and unlike some other cheap meters, the FS5000 doesn’t look cheesy or anything like that – it feels like a proper measuring device. The body is made out plastic which is pretty decent but I would still avoid dropping it and handle it with care as it doesn’t come with any type of carry case.

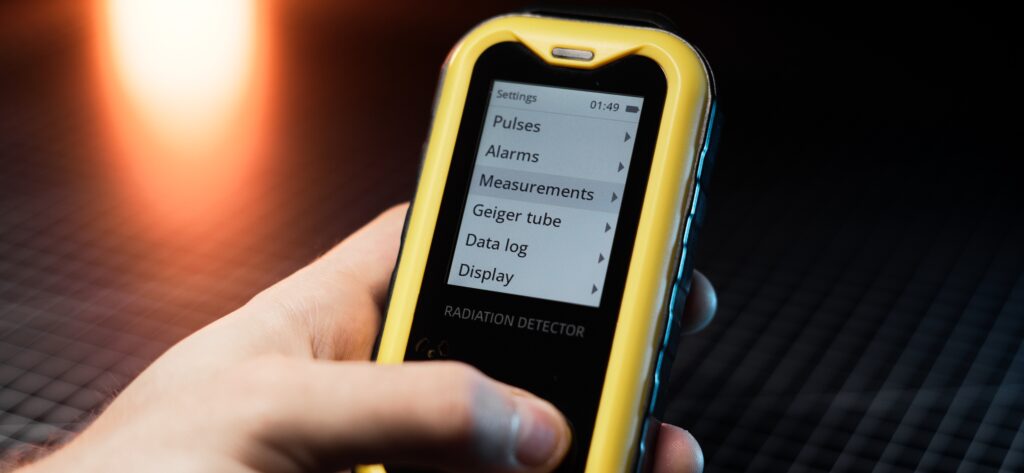
The user interface is pretty intuitive and the menus are simple to navigate. The measurements are displayed on a large screen which is decently bright to be used even in bright daylight. There is also a speaker with audible clicking sound which a great bonus but it isn’t very loud and can be hard to hear in some noisy environments and the LED on the top of the meter only flashes when the alarm gets triggered.

The device runs an internal rechargeable battery which should last for about 5 days according to the manufacturer. While battery life is pretty good, I’d prefer if the unit used standard AA batteries which can be easily and quickly swapped out in the field if needed.

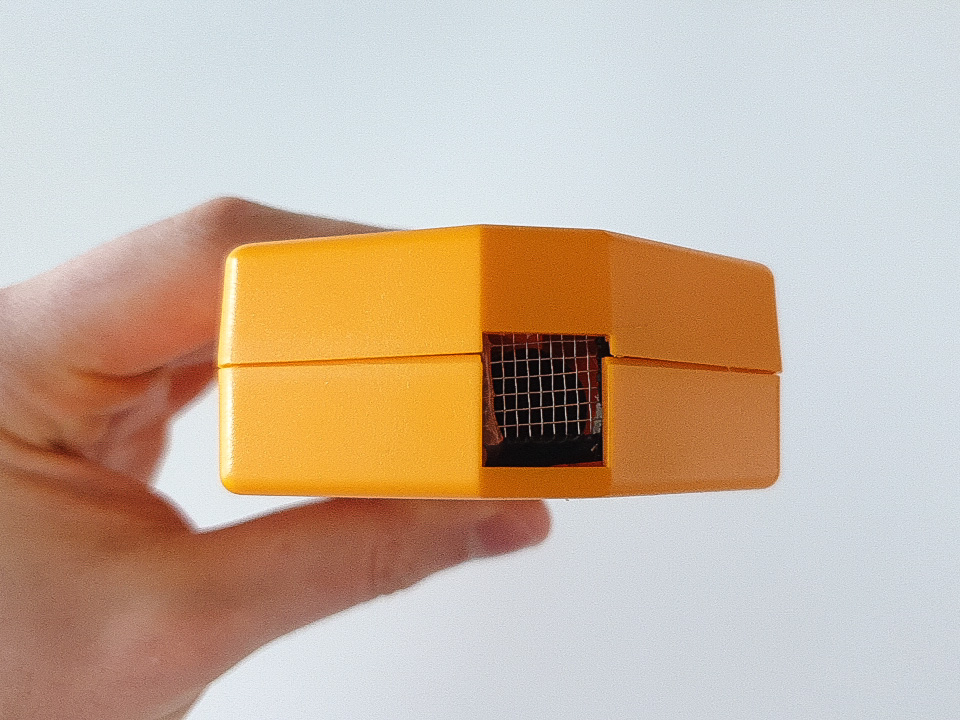
The tube used by this meter is the J321 which is a glass tube and it is ok. It gives around 20 CPM of background and it is able to detect hard beta, gamma and Xray radiation. Compared to other Chinese tubes, it is definitely much better but I wouldn’t call it an ideal design. I’m still waiting for Chinese manufactures to create a tube that can truly rival and beat the good old SBM-20, especially as its supply really dried out in the recent years.

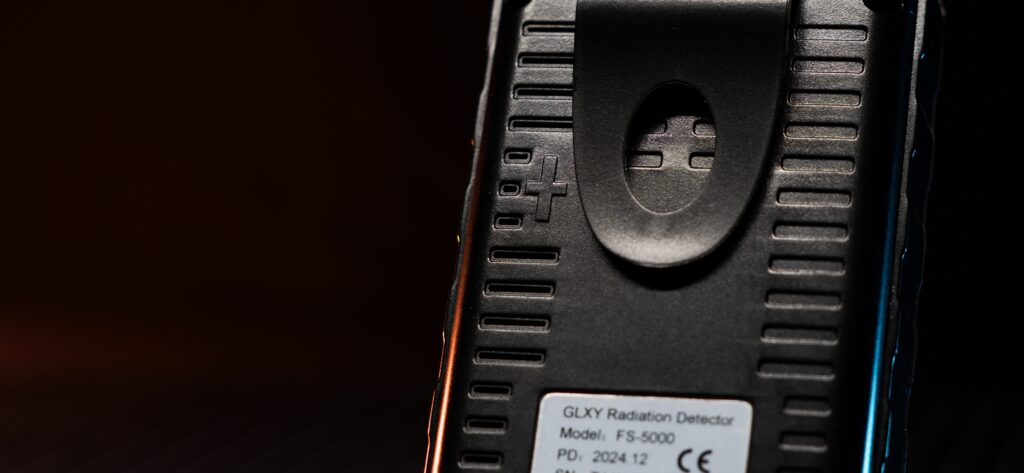
On the bak of the unit there are small opening in the body which allow beta particles to reach the GM tube however there is no beta shield, which is a big bummer as it makes all the dose reading in uSv/h, pretty much pointless as beta activity will highly inflate them. I would really like to see a removable beta shield like on the Terra-P meters added to the future models. Luckily there is a CPM and even CPS mode but with low sensitivity of the J321 tube, I think the CPS is really unnecessary and I would just stick to using the CPM.

When considering the FS5000, make sure that the listing explicitly states that the meter comes with J321 and not some other generic GM tube. While reading through some forums, I noticed that some of these meters came with alternative tubes which have much worse performance and should be avoided.

So how does the FS5000 perform?

I tested my FS5000 meter against a few of my sources which include a negative ion pendant, a thorium gas mantle, a coin made out of pure lutetium metal and a high grade Uranium ore.

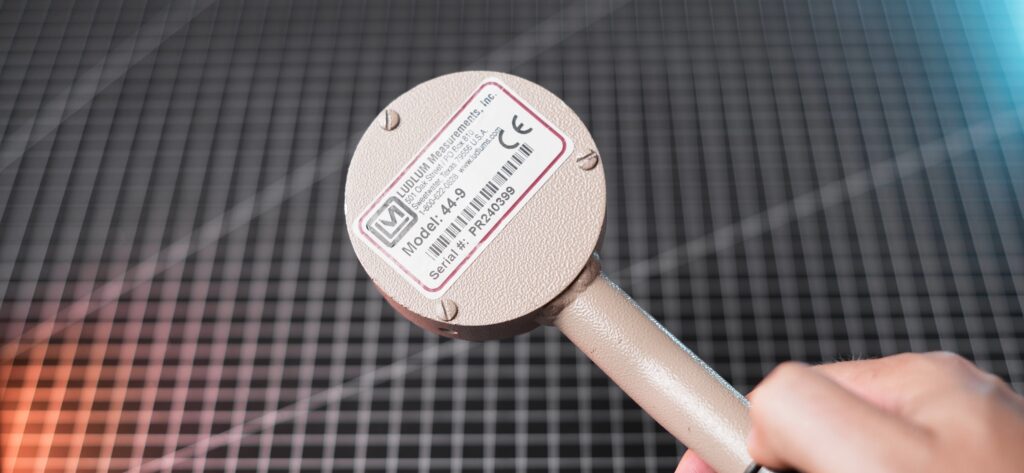
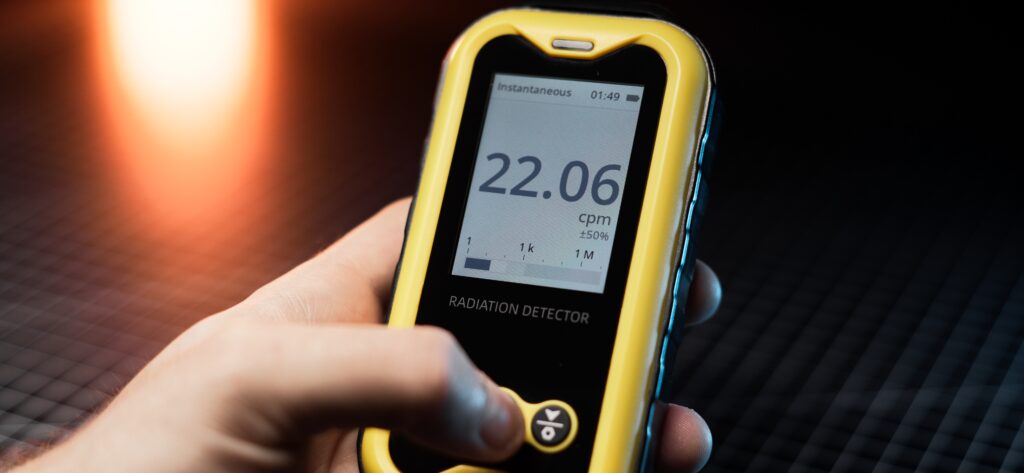
As mentioned previously, the FS5000 doesn’t have a beta shield which makes the dose rate reading irrelevant so I will be using the CPM as they display the raw data from the detector. Remember that CPM are dependent on the tube used by the meter and the results measured with a J321 will be vastly different from ones measured with the LND7311 found in my Ludlum 44-9 probe which I normally use.

First up is a Negative Ion pendant which contains Thorium 232. The FS5000 measured pretty low activity and it took the meter a while to show the final result which was 50CPM, only 30 CPM over background. Not an ideal result.

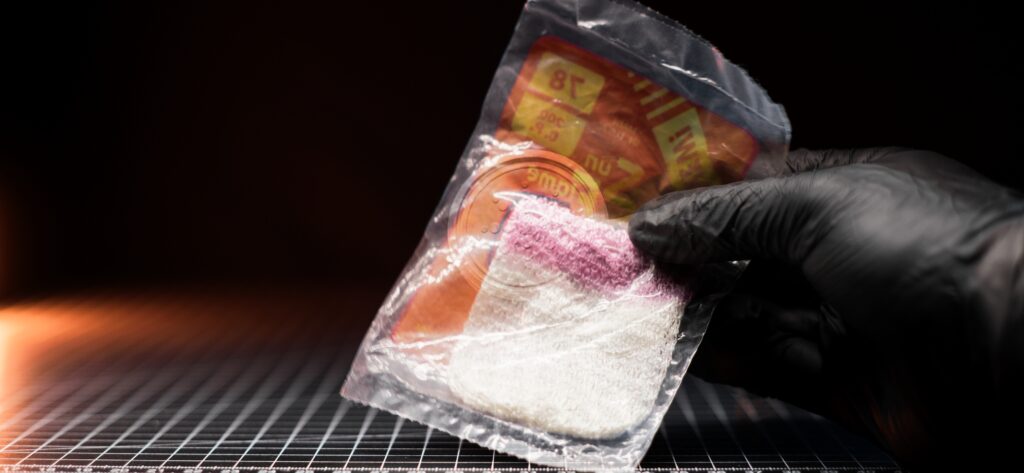
The Thorium gas mantles are pretty common and easy to find check source. This time the FS5000 had no problem with detecting them and I got around 450 CPM. Definitely a better result than with the pendant.

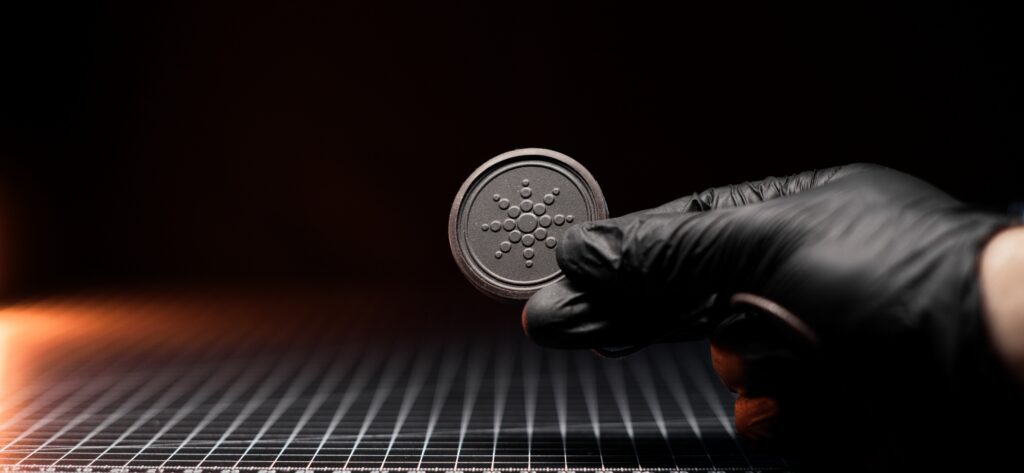
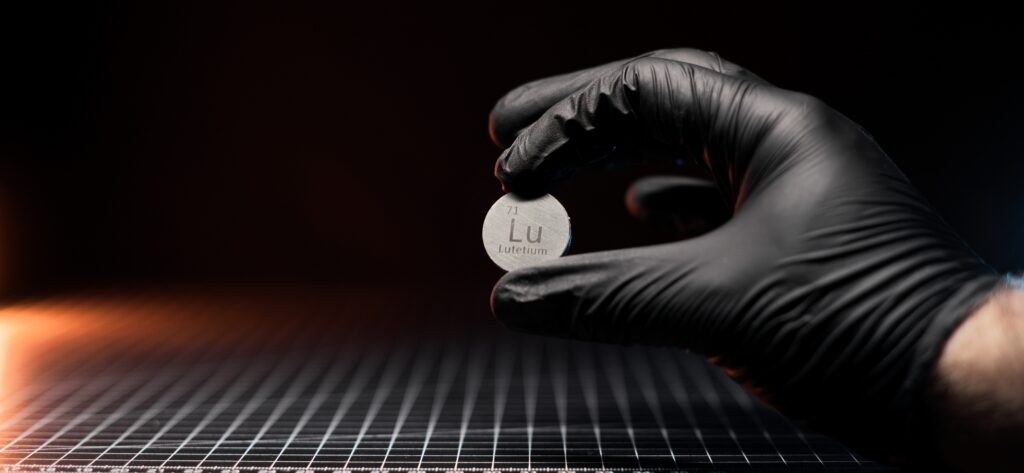
Most budget meters struggle with detecting very low activity samples. This Lutetium coin contains 0.218g of radioactive Lu176 isotope which has an activity of ~440 Bq. It is a very low activity sample but detectable with my more sensitive meters. The FS5000 however struggled with detecting it. The readings eventually did go up by a few counts but it took a while and I don’t think I’d be able to detect in the field. Unfortunately the FS5000 failed this test.

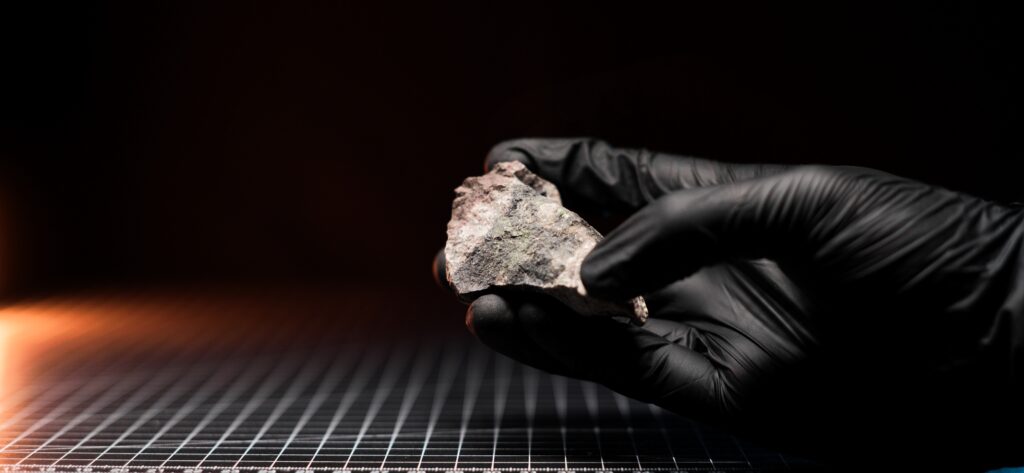
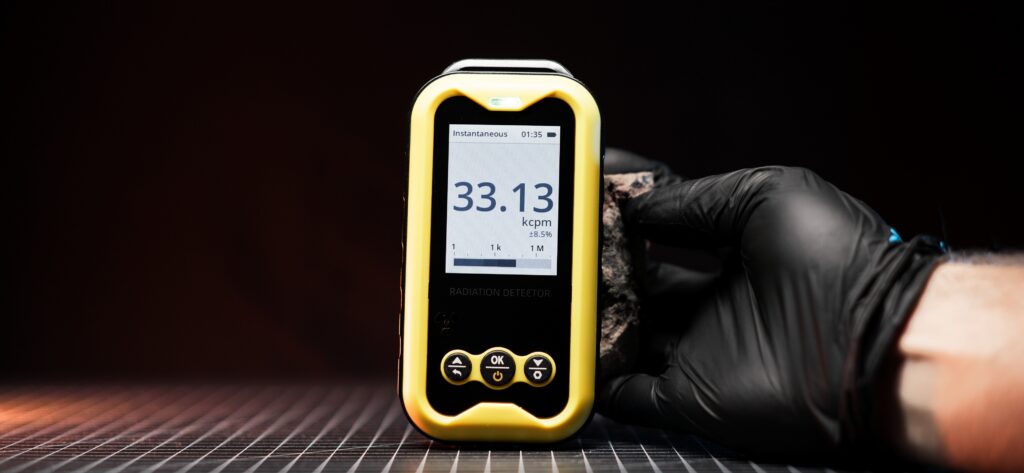
Lastly, I tested the meter against a piece of a high grade Uranium ore and it had absolutely no problem in detecting it but it took over a minute before the final result stabilised at over 36k CPM.

After conducting the stress test, I notice another big problem with the FS5000 meter. It takes a while for the readings to comedown back to background radiation levels after measuring hot samples.

Rad Pro Upgrade

As we discovered, the main issue in most of these cheap Geiger counters is a bad firmware. It usually has slow averaging time which doesn’t adjust to sudden changes in activity resulting in very slow calculation of the measurements. When compared to my RAYSID or my MKC-01CA1M, the FS5000 doesn’t even come close. This is a serious issue which always made me recommend against buying cheap meters.

However, the community is great and a guy called Gissio wrote a custom firmware called RadPro which addresses most of the firmware issues. After installing it, the FS5000 became much more responsive to sudden changes in activity and the new firmware also brought a bunch of new features, which really elevate the usability of the meter.

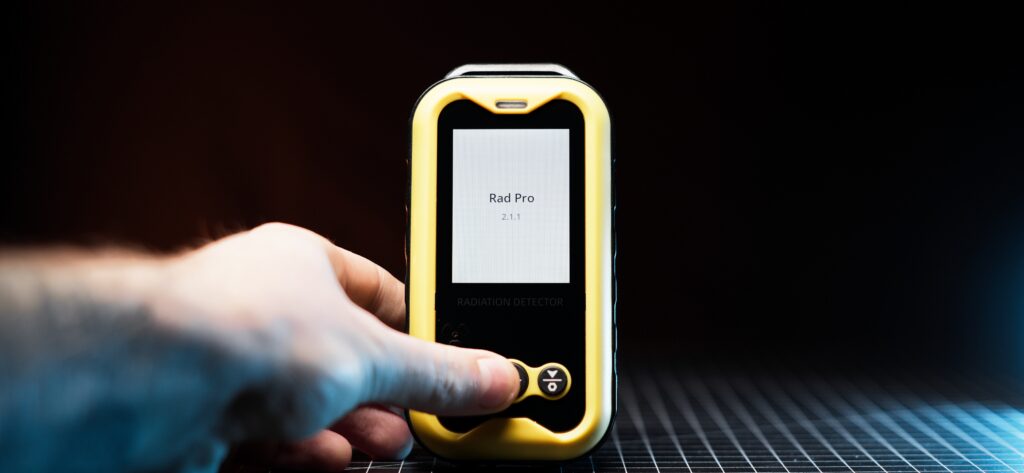
The only real downsize of this new firmware is that the device eats through the battery much quicker but I think it is a worthy sacrifice. Hopefully this can be optimised in a future update.

I definitely recommend checking it out if you have one of the following meters:

FS2011, YT-203B, Bosean FS-600, Bosean FS-1000, Bosean FS-5000, FNIRSI GC-01 and JOY-IT JT-RAD01

Link to Rad Pro: https://github.com/Gissio/radpro

Summary

The Bosean FS5000 has positively surprised me with its value for money, especially after installing the custom RadPro firmware. It definitely won’t be replacing my other meters such as the Terra-P or the MKC-01CA1M but I wouldn’t hesitate to recommend it to someone who is just starting out and looking to buy their first cheap meter to begin their journey with radiation detection.

I want ot hear from you! Do you have the FS5000 meter? What are your experiences with it and do you use the custom Rad Pro firmware with it? Let me know, in the comments below!


Thank you so much for reading this post, I hope you enjoyed it and learned something new! If yes, please make sure to subscribe to the email list so that you get notified when new posts are added. Also feel free to check out my Ko-Fi page where you can donate a nice cup of radioactive coffee and support my work financially.

and remember, stay active!

Ludlum Model 3 – The Best Meter I’ve Ever Used!

Welcome back my fellow radiation nerds! Today we will dive deep into what is arguably one of the best radiation meter out there, the Ludlum Model 3!

The history of Ludlum Meters

The Ludlum Measurements, Inc. was established in 1962 by Don Ludlum, who was an engineer with a background in designing radiation detection equipment. Not long after, it has produced its first commercially available meter, Ludlum Model 2. Ludlum’s official YouTube channel has a very interesting video on one of the very first units ever made with a serial number of 31, which I have linked in the description below.

His meters quickly gain popularity and good reputation for their reliability and long use life, which quickly established Ludlum Measurements as a trusted name in the world of radiation detection. The success of the initial models paved the way for the development of a wide range of survey meters and radiation detection equipment that continues to be used around the world to this today.

The versatility of Ludlum Meters.

Ludlum meters are the go to meters for many scientists and first responders, because of they are extremely rugged, reliable and easy to use design. Furthermore, Ludlum Measurements offers a wide range of probes and accessories which can be easily swapped out for various applications. Adding the long and proven track record, it is easy to see why Ludlum meters became the preferred choice for scientists worldwide.

Different Ludlum models

If you look at Ludlum’s product range, you will quickly realise that there are a bunch of different models out there. However for the personal use purpose, I think these are the ones worth considering.

Ludlum Model 2 – It is most basic, analog meter that Ludlum made (discontinued but can be found used). It has the 3 operating mode x0.1, x1, and x10 which might not be enough if you plan using it with sensitive detectors such as scintillator probes.

Ludlum Model 3 – A step up from Model 2. It offers extended measuring range (x100) and improved circuitry and electronics.

Ludlum Model 12 – Supports internal voltage measurement for easy switching between different probes which might require different operating voltage. For that reason, it also has an extended voltage range (400 to 2500 Vdc).

Ludlum Model 14c – Overall similar to Model 3, however it houses a small, gamma compensated GM tube which automatically operates when the scale is set to the x1000 mode.

Ludlum Model 2221 – Digital scaler/ratemeter with advanced data logging capabilities, often used for more precise and detailed measurements.

Ludlum Model 2241 – General-purpose scaler/ratemeter with a digital display.

There are plenty more of Ludlum models out there and if you want to learn more about them, I encourage you to read the detailed description on Ludlum website (click here).

Technical data and features of Ludlum Model 3

The Ludlum Model 3 has a range from 0 to 500,000 CPM and can supply voltage to the probe between 400 and 1500V. This flexibility allows it to work with a wide variety of detectors, including scintillators and some neutron detectors. Most of the time, I pair mine with a 44-9 probe, however I do change that occasionally depending on the situation

The meter features a rotary switch for selecting different measuring ranges and performing a battery test. It also includes both slow and fast averaging modes, which are particularly useful for obtaining accurate readings in varying conditions.

Powered by two D cell batteries, the Model 3 offers approximately 2000 hours of use. The batteries are housed in a separate compartment, which helps protect the electronics from potential damage in case of battery leakage. Additionally, all parts of the Ludlum Model 3 are sealed to prevent moisture from entering the meter, enhancing its durability.

These features clearly demonstrate that Ludlum meters are built to last and why they’ve earned their stellar reputation.

My Ludlum Model 3

I acquired my Ludlum model 3 a few years ago, and it has been my primary meter ever since. It has a serial number of 104163 and it was manufactured on April 16th, 1992. Despite its age, it operates flawlessly, having only small scratches from regular use. In order to ensure accurate readings, I calibrated my unit using a pulser made by GEOelectronics.

My unit has meter face showing only CPM. If you have seen my previous video on how to measure radioactivity, you know I am not a fan of dose units when used to measure activity of samples, so this works perfect for me. Ludlum does offer different meter faces for different probes, however I’d still recommend to sticking with the CPM.

Originally, my meter came with a “C” type connector, which is common on most Ludlum devices. However, this connector is hard to come by in Europe, so I replaced it with a BNC connector. This modification has made it much easier to find compatible cables and probes. The meter also came equipped with latches for a strap, which, while I don’t use them often, are a handy addition for prolonged use, as the meter can get heavy. Lastly, I crafted a probe holder for my 44-9 from a sheet of metal. While it’s not the most aesthetically pleasing, it gets the job done. I’m also thinking about adding a check source holder to the side of my meter, however I can’t seem to find one for a good price.

How to buy a Ludlum meter?

So, you want to buy a Ludlum meter. But where can you find one?

If you’re set on a brand-new meter, you can purchase directly from the Ludlum website. However, be aware that their prices are generally aimed at labs and government agencies, not private individuals. A new Ludlum Model 3, for example, costs around $1,000, and that’s without any additional accessories or probes.

In my opinion, it’s a far better choice to buy a used (or refurbished) unit online. Labs occasionally clear out old inventory, and this is the best time to find used meters and probes at a relatively low price. I got my meter during one such sale for fraction of what a new one would cost me.

When evaluating a used meter, ensure it’s in good visual condition (no dents, corrosion on battery ports or cracked glass). Ludlum meters are mostly analog, making them easy and inexpensive to repair if any internal parts fail. This being said, I noticed that newer Ludlum meters are made with a PCB which use those micro components which are much harder to work with unless you have proper tools for it.

Alternatives to Ludlum

Ludlum isn’t the only company producing high-quality radiation meters. Brands like Eberline and Johnson also offer fantastic meters that are worth checking out, often at a lower cost than a Ludlum.

For example, I found my Eberline 120 survey meter (which is similar to a Ludlum model 2) that came with an HP260 probe and a check source holder for a total of 110 British pounds, including shipping!

Good deals are out there—you just need to be patient and keep an eye out, and eventually, one will pop up.

A few final words

Ludlum meters are the industry standard for a reason, and I highly recommend checking them out. Their professional build, high performance, and versatility are what led me to purchase one for myself, and I have absolutely no regrets.

I’m curious to hear about the meters you use for your measurements. Do you have, or are you planning on investing in, a Ludlum meter? Let me know in the comments!


Thank you so much for reading this post, I hope you enjoyed it and learned something new! If yes, please make sure to subscribe to the email list so that you get notified when new posts are added. Also feel free to check out my Ko-Fi page where you can donate a nice cup of radioactive coffee and support my work financially.

and remember, stay active!

Is the Better Geiger S-2 actually better?

Welcome back my fellow radiation nerds, Today we are taking a closer look at the BetterGeiger S-2 meter and if it’s really a better geiger counter!

Geiger counters are one of the most common tools for measuring the radiation around us, but they’re not perfect. They often suffer from limitations such as inaccurate dose rates and low sensitivity which are a characteristic of the Geiger-Muller tube used by the most meters.

In the recent years, there has been a surge in products that use small scintillation crystals instead of the more traditional GM tubes but they are usually more advance devices, target at experienced users, not entry level amateurs

This is where the BetterGeiger S-2 meters comes in

BetterGeiger S-2

First things first, I would like to thank Robert from Better Geiger who was kind enough to provide me with the S-2 meter making this video possible.

The Better Geiger S2 is a personal radiation detector manufactured in Colorado, USA. It is made out of high quality plastic which feels solid and durable and for extra protection, the unit is wrapped in a rubber case which should prevent it from any fall damage if it would slip out of hand.

While slightly on the bigger side, it can be operated singlehandedly and navigating through the menus and setting was pretty simple and intuitive.

Despite its name, Better Geiger does not use a geiger muller tube. Instead it has a small scintillation crystal which gives about 100 CPM of background activity and is rated for a maximum dose rate of 100 mSv/h for Cs-137.

Unlike most geiger counters, BetterGeiger factors in the different gamma energies detected to give accurate gamma dose readings. The measurements can be displayed as uSv/h, mRem/h or CPM and the unit does also has an alarm feature which threshold can be adjusted to the user’s preference.

While it can detect some strong betas, it’s not particularly sensitive to them and I think it’s better to think of the meter as gamma only.

When compared to my other meters, the BetterGeiger showed much higher sensitivity to gamma radiation which is particularly helpful when looking for radioactive minerals. I got a few uranium hunting trips planned, and I’m very excited to take the meter with me and see how it performs.

Improvements for the future BetterGeiger S-3

I really did enjoy using the BetterGeiger S-2 meter, however I see some potential improvements for future versions to make it even better.

The firstly, I would love to see a bigger sensor which would increase the sensitivity of the meter.

Secondly, I would move the sensor to the top of the meter. At the moment it is facing the user, making it hard and impractical to measure different sources, as it’s not always easy to see the readings on the screen.

Thirdly, I would like to see an improved algorithm which would quickly adjust the readings when there is a sudden increase in activity but then stabilises once the correct measurement is reached. The one currently used is definitely not bad and does the job well but it would make the unit faster and more responsive.

Lastly, the plastic used over the display screen is way too soft which makes it very easy to scratch. I would to see it replaced with a harder one that is more resistant to wear and tear of everyday use.

So, is it worth it?

Considering that the unit is priced at just under 150 dollars, I think it is a good alternative to many other meters in the same price range. I love that it shows accurate gamma dose readings and that it has a higher sensitivity to gamma radiation than a conventional geiger counter. While it isn’t the perfect tool for everyone, as it doesn’t detect beta radiation very well, I think it’s still solid meter offering something new and unique to the market.

I want to hear from you. What are your thought about Better Geiger S-2 and do you have any experience in with it? Let me know in the comments below!


Thank you so much for reading this post, I hope you enjoyed it and learned something new! If yes, please make sure to subscribe to the email list so that you get notified when new posts are added. Also feel free to check out my Ko-Fi page where you can donate a nice cup of radioactive coffee and support my work financially.

and remember, stay active!

Youtube Video

What people forget when collecting uranium minerals…

Welcome back my fellow radiation nerds. Today we will explore a the radioactivity of a noble gas that is the second leading cause of lung cancer, Radon 222!

During my recent trip to US, I visited a couple of famous uranium mining sites including Mi Vida and Cotter mines. There I collected a few small samples of the uranium minerals and while the radiation coming from those samples might be a bit high when measured up close, it is important to remember that they are point sources and with distance, the activity drops quickly back to normal levels. Furthermore, the plastic display boxes I keep the samples in, prevent the spread of any particles and pieces that might have fallen off the main mineral.

However what concerns me is not the radiation coming from the Uranium minerals, but a gas emitted by them called Radon.

So what’s the deal with radon?

Radon 222 is a naturally occurring radioactive element with an atomic number of 86 and it is a part of the uranium decay chain, directly being produced by the decay of Radium 226. It was first identified in 1899 by Ernest Rutherford and Robert B. Owens at the McGill University in Montreal, making it the fifth radioactive element to ever be discovered. It has a half-life of 3.8 days and it decays into Polonium 218 through alpha emission with an activity of 5.67 × 10¹⁵ Bq/g (5.67 PBq or 153 Curies).

What makes Radon particularly dangerous, is its possible buildup in side of buildings as it escapes from ground as a result of natural uranium decay. Its detection is challenging as Radon is a noble gas and it doesn’t have any smell, taste or colour and can only be detected using specialised equipment. This results in Radon gas being the second leading cause of lung cancer, second only to smoking cigarets.

Furthermore, Radon decay products can easily attach themselves to anything they come in contact with, this includes cloths, hair and also lungs if inhaled. While the half-life of radon is only 3.8 days, it decays into toxic, heavy metals including Polonium, Thallium and Lead. This means that if inhaled, these elements will remain in the lungs and eventually be absorbed by the body.

In some countries, Radon tests are mandatory for residential and public buildings and the levels should not exceed 300bq/m3, although WHO recommends to keep the levels below 100Bq/m3 and EPA recommends action if radon levels exceed 148 Bq/m³ (about 14 pCi/L).

If you have ventilation system with air filters inside your building, you can do a simple experiment and check the filters for Radon using a simple geiger counter. I did that at my parent’s place and their filters clearly showed increase levels of radiation. This is perfectly normal and should not be anything to worry about as long the Radon levels inside the house are within the recommended limits.

A gamma spectroscopy of an active carbon sample that has been exposed to radon gas shows interesting spectrum. While it is similar to Uranium or Radium, it clearly misses peaks from isotopes found higher in the decay chain

Here is a gamma spectrum of uranium ore for comparison. As you can see, the peaks from U-235 and Ra-226 are missing

Isn’t my geiger counter good enough?

Now you may wonder, I have a geiger counter, can’t I use it to measure radon? Well, technically yes, but it’s a bit more complicated than that. While a Geiger counter can detect radiation from radon decay products, it is not an ideal tool for the detection of radon gas or measuring its concentration. In order to do that a dedicated radon meter must be used which is specifically designed for this purpose and will give precise, long-term measurements, which are essential for evaluating any potential health risks from radon exposure.

Aranet Radon Plus & Aranet Radiation Meters

In order to keep track of the radon levels at my home, I reached out to the amazing guys over at Aranet who have kindly provided me with their Radon Plus & Radiation meters which inspired and made this video possible.

The meters look great and have very nice, elegant design and use a E-Ink displays, which looks fantastic and consumes very little energy allowing them to run for multiple years on just two AA batteries which come included in the box. The initial setup and connecting the meters to the Aranet phone app was a piece of cake and the app allows to get much more insight about the data being recorded.

Both meter are fairly compact and have the same width and hight, however they do differ in their depth as the Radon Plus uses ionisation chamber which requires extra room compared to pin diode detector used by background radiation meter.

Aranet Radon Meter can switch between different averaging periods from 10 min, 24h, 7d, 30d. Radon levels do fluctuate depending on the weather, temperature and other environmental factors and this allows for obtaining precise and accurate readings over time.

If you want to learn more about those meters, make sure to either check out Aranet website (click here) or their YouTube channel.

My Radon Levels

Coming back to my concern about the radon levels. After setting up both meters, I allowed them to run for a few day so that they could collect an average measurement. When I checked the Aranet app, I saw that the readings for Radon concentration were around 40Bq/m3 depending on the time of the day and the background radiation hovered at around 0.10uSv/h, which is more than acceptable and within the recommended limits.

Realistically, having just a few small uranium minerals should not cause any significant increase in radon levels but I’ll continue to monitor the readings just in case, especially since winter is coming and ventilating my home isn’t as easy as in the summer time.

What to do if my levels are high?

Although I haven’t measured any significant levels of radon at my home, this might not be true for everyone. If the your levels are elevated, the easiest solution is ventilate the room more often. In some extreme cases, a more drastic measures have to be taken which can include sealing off the basement floor or installing an active ventilation system but I’d recommend consulting a specialist first before taking any action.

Where to get Radon and Radiation home meters

If you are a collector of uranium minerals, radium watches or other items that can produce radon gas, a Radon meter is a definitely a must. This being said, if you live in an area with known to have high levels of Radon concentration, investing in a Radon meter is definitely a good idea.

The team at Aranet has also provided me with discount code for all viewers of the channel. So if you decide to buy a meter from Aranet, make sure the enter ALLRAD5 at checkout which will give you 5% off from your order. Alternatively you can also use the links in the description of the video:

Radon meter: https://bit.ly/4dNCZdn
Radiation meter: https://bit.ly/3ZkwkTI

Thank you Aranet once again for providing me with the meters and making this video possible!

I’m curious to hear about your experiences with Radon. Do you live in high radon area, do you use a Radon meter and how do you control the levels at your home? Let me know in the comments below!


Thank you so much for reading this post, I hope you enjoyed it and learned something new! If yes, please make sure to subscribe to the email list so that you get notified when new posts are added. Also feel free to check out my Ko-Fi page where you can donate a nice cup of radioactive coffee and support my work financially.

and remember, stay active!

How to accurately measure radioactivity

Radioactivity is all around us but how do we actually measure it? You probably heard people talk about Siverts, Curies, Becquerels, Count per Minute and many other types units, but which ones should we actually use?

Most units can be put into two categories, activity units and dose units.

Activity units

To measure the activity of radioactive objects we use unit called Becquerels, where 1 Bq is equal to 1 decay per second. If you are located in US, you are probably more used to using Curies where 1 Curie is equal to the activity of 1g of pure Radium 226, which is 37 billion (3.7 x 10¹⁰) Bequerels.

Many radiation meters use counts per minute (CPM) or counts per second (CPS) instead of Bequerels. This is because these units show the exact amount of radiation decay events detected by the geiger tube or scintillator used by the meter. Depending on the type of detector, its sensitivity will vary, meaning that some can show 200CPM while others can show 1000CPM for the same source.

When it comes to geiger muller tube detectors, one of the most commonly used by the scientific community is the LND7311, which is often found in the pancake style probes such as Ludlum 44-9.

The activity units are the best way to measure how active an object or an area is.

Dose units

The most common dose units are Sivert and REM (Roentgen Equivalent Man) and 1 Sivert is equal to 100 REM. Both Sievert and REM are used to measure the biological effect of ionising radiation on human tissue. Sievert is a SI unit, while the REM is a part of the older Centimeter-Gram-Second system or CGS for short. Similarly to the case with Becquerels and Curies, Siverts are used in most countries around the world, while the US still sticks with REMs.

Some geiger counters, such as Terra-P, show the readings only in dose units as they have been designed to be used in nuclear contaminated environment and quickly inform the user about the dose they are being exposed to.

These readings can be widely inaccurate when measuring radiation coming from other isotopes to which the meter has not been calibrated too, due to the differences in gamma ray energies that different isotopes produce. Here is an example, most geiger counters are usually calibrated for Cs137 which has gamma energy of 662keV. Americium 241 on the other hand has an energy of 59.5keV, while Cobalt 60 has energies of 1173 and 1332kev. This means that the dose emitted from these isotope wont be presented accurately when measured with a geiger counter that has been calibrated for Cs137. Some GM tubes are gamma compensated and will show more accurate results even when used to measure isotopes outside of their original calibration source, such is the case with the CDV-700 geiger counter.

Distance and inverse square law

When measuring samples, it is important to keep a distance between a source and the detector. This ensures accuracy and consistency, as it adheres to calibration standards and minimises errors from scattering and absorption. Furthermore, it optimises the detector’s sensitivity and efficiency while reducing the risk of contamination or accidental exposure, ensuring reliable and safe measurements.

Conclusion

Personally I try to always give the measurements in counts per minute which I get on my Ludlum Model 3 meter with a 44-9 Pancake Probe at 1cm distance from the source. This way I can ensure that the results are accurate, consistent and comparable between different test. Sometimes I also include a dose rate in uSv/h which I measure using my RAYSID gamma spectrometer which factors in the different gamma energies of the isotopes being detected.

Thank you so much for reading this post, I hope you enjoyed it and learned something new! If yes, please make sure to subscribe to the email list so that you get notified when new posts are added. Also feel free to check out my Ko-Fi page where you can donate a nice cup of radioactive coffee and support my work financially.

and remember, stay active!

How to calibrate and maintain your Geiger counter

Welcome back my fellow radiation nerds! Today we will dive deep into how to calibrate Geiger Counters so that they show true readings!

If you are collector of old, vintage Geiger counters then you know that they are not only they are built like tanks but also have a certain character and feel to them. Unfortunately, the calibration on them might be a bit off as a result of their ageing components. Today I want to show you how you can easily calibrate your Geiger counter so that it shows accurate readings again!

In order to do this you will need:

  • a multimeter with 2 probes and a 1G Ohm (1000M Ohm) resistor for measuring the HV
  • a pulser
  • and your Geiger counter with a cable to connect a GM probe

Firstly, you will need to check if the voltage on your meter if it is correct using a multimeter and a 1G Ohm resistor. I already made a post about it which you can find HERE.

The next step is to connect the pulser in place of the probe. Pulser will generate “clicks” at a consistent rate which will allow us to calibrate the meter. I personally use one made by GEOelectronics and I highly recommend it but others should also work fine.

Now turn on your meter and set your pulser to generate a desired amount of CPM. Make sure that the needle on the meter is showing the correct amount of CPM generated by the pulser on every scale. If it is not, then adjust the calibration potentiometer until it sits right where you want it.

Ludlum Model 3 calibration potentiometers

If your meter uses dose units such as uSv/h, then you will need to find a conversion rate from CPM to uSv/h for the Geiger tube used in your meter. THIS post by DIYGeiger covers most of the GM tubes commonly used and gives a rough conversion ratio from CPM to uSv/h. Please note that this isn’t very accurate and if possible, you should use CPM when measuring activity of a samples. Dose units work only when the meter is calibrated to the specific isotope which is being measured. In other cases, the readings can be lower or higher than in reality.

Congratulations, you have now successfully calibrated your Geiger counter! However if you are a professional and you want the most accurate calibration on your meter, then you should most probably send your meter for calibration to a professional lab but for most hobbyists, this method should be more than enough!


Thank you so much for reading this post, I hope you enjoyed it and learned something new! If yes, please make sure to subscribe to the email list so that you get notified when new posts are added. Also feel free to check out my Ko-Fi page where you can donate a nice cup of radioactive coffee and support my work financially.

and remember, stay active!

How to properly set the voltage on a Geiger counter

Recently, I have acquired an Eberline 120 survey meter however since it is pretty old, I was a little bit worried that the voltage coming from the unit might be too high for the probe due to the age of the internal components so I decided to measure it just to be sure.

Unfortunately, if you are going to measure the voltage using a cheap multimeter, you won’t get an accurate reading. That is because the impedance on the multimeter is different from the one on the Geiger counter. An easy way to fix this issue is simply to add a 1G Ohm (1000M Ohm) resistor between the positive probe and the Geiger counter.

1G Ohm (1000G Ohm) resistor

Now simply set the multimeter to the 2000mV and connect probes to the BNC connector on the Geiger counter. The number on the display of the multimeter shows the voltage coming from the Geiger counter.

Since I have a lot of Geiger counters, I have decided to make my own probe with a 1G Ohm resistor built into it. Whenever I want to measure the voltage in my meters I can quickly change the standard probe for my moded one!

Here is another great post on this topic:

https://ea4eoz.blogspot.com/2012/09/one-gigaohm-high-voltage-probe.html?fbclid=IwAR35wkE80V-yRVkkodyz_Gpa6DZnuyyPXcLMwAthdo9z8kKJjrWDpUucpsY

RAYSID – gamma spectroscopy on the go!

Today I want t show you a device that allows you to do gamma spectroscopy on the go! Let’s take a closer look at the RAYSID Gamma spectrometer.

RAYSID is a gamma compensated dosimeter, gamma spectrometer and radiation mapping/logging device all in one small package. There are 4 models with the cheapest being 300 euros and the most expensive being 600 euros. All of them have exactly the same features with the only difference being the value of the FWHM which is important only when doing gamma spectroscopy. So if you are not interested in doing gamma spectroscopy then you will be perfectly satisfied with the cheapest model but if you would like to do gamma spectroscopy then I would suggest you invest in the slightly more expensive model.

In terms of size, RAYSID is comparable to a Zippo lighter and weighs only 65 grams. Inside there is a rechargeable battery that lasts for over 10 days on a single charge. The heart of this device is a 5 cm3 Thallium activated Caesium Iodide (CsI(Tl)) scintillation crystal.

Inside the box, there is a manual, USB charging cable, caring case, selfie stick with a holder for RAYSID and RAYSID itself.

In order to use the RAYSID

to its fullest potential, it is best to connect it with RAYSID app. Unfortunately, the RAYSID app does NOT work with iOS and is only compatible with android 5.0 (or higher) devices.

In order to turn the unit on, we simply need to press the power button. Next, we can open the RAYSID app and connect RAYSID with our phone. In order to turn on/off the speaker simply press the power button once. To turn the unit off press and hold the power button.

Search mode

Search mode is useful when searching for radioactive hot spots. The upper side of the screen displays a graph showing current CPS and the dose while the lower side shows the rough gamma spectrum which is updated in real-time.

On the right side, there is a set of icons. The first one locks the display in the current position (vertical or horizontal). The camera icon allows you to take a photo with the current measurements.

Gamma Spectroscopy

One of the best features of RAYSID must be its ability to do gamma spectroscopy. Depending on the model, FWHM varies from >15% to <8.5%*. The smaller the FWHM the more accurate and narrow peaks. For the best result, it is best to have FWHM below 10%.

As of right now, the spectrum range is from 25 keV to 1000 keV which means you should be able to identify the most common radioactive isotopes such as U-238, Th-232, I-131 or Cs-137. In a future update, the range will be extended to 3000 keV allowing for the identification of radioactive isotopes such as K-40 or Co-60.

Another great feature is that RAYSID has a temperature compensation which results in the spectrum not being affected by the weather (in extreme cold or heat, spectrum mode is unavailable). Manual calibration can be done in the “settings” tab.

What I really like is that when doing a gamma spectrum, the app automatically identifies different isotopes based on their energy peaks which means you don’t need to analyse the spectrum to identify the isotope you are measuring. The average dose and CPS are also displayed.

It is also possible to save the background spectrum which helps visually to see any minor differences when measuring samples for a trace amount of radioactive contamination. In order to do that simply click on the “BG” icon with a “download” arrow. This will save the current spectrum as background. You can toggle on and off the background spectrum by pressing the “BG” icon.

Triple pressing the power button will restart the spectrum

*FWHM measured at 662 keV

Map

Since RAYSID is so small, it is very portable and you can take it anywhere you want. What is even better is that it automatically makes a map of background radiation anywhere you go! You can set the map to show background dose (uSv/h, uR/h) or background activity (CPS, CPM and Bq/m2 (only for Cs137)).

To enable global map press the “web” icon. If you wish to share your map with RAYSID global map than press “share” icon. If you want to delete point on the map click the “bin” icon and hover the red square over the points you want to delete

You can have a look at the current state of the map by clicking HERE

Alarm & Log

A CPS or dose alarm can be set in the “setting” tab. When an alarm is trigger, it will be logged in the “Log” tab. Double pressing the power button will turn the alarm on or off.

Conclusion

I personally think that RAYSID is the best device of its kind. Relatively low price and very good performance make it one of my favourite radiation detectors in my collection and since it is so portable, I take it everywhere with me! So if you are in the market for a portable gamma spectrometer I highly recommend the RAYSID.

Is the Gamma-Scout Geiger counter any good?

Gamma-Scout is an iconic Geiger counter but is it any good? Let’s find out!

Before I start, I must say that the unit that I got is not stock. It has a new battery and the GM tube was swapped for Philips ZP1400 since the original Ludlum LND712 was broken. Lastly, I have also added a metal mesh in front of the GM tube for some additional protection when measuring alpha radiation.

The version I got is the Standard model which retails for around 380 euros. Gamma-Scout offer three other models. Alert model which has an audible clicking sound and a settable alarm, a rechargeable model that has a rechargeable battery and an Online model which allows user to connect the Geiger counter to PC wirelessly.

Despite the fact, the GM tube was not original, the results I got were fairly similar to my other Geiger counters which meant that Philips ZP1400 is a very good alternative to the LND712.

Gamma-Scout next to Terra-P

One small design issue that I noticed with the Gamma-Scout is that the GM tube is slightly pushed back into the meter. This means that detecting alpha particles will be more difficult since they have a very small range.

What I really like about this meter is that it can detect alpha, beta, gamma radiation and it shows readings in dose units as well as raw activity (CPS).

Unlike most electronic devices, Gamma-Scout has no on/off button. It remains always turned on until the battery dies. Luckily, this unit is designed to run for over 10 years without the battery running out, and if it does, Gamma-Scout recommends sending the unit back to them for battery replacement and calibration but in my experience, it is fairly easy to replace the battery by your self if you know how to solder.

Unfortunately, this meter also has some downsides. There are some quality control problems including the radioactive logo being distorted and the upper and lower body parts not fitting perfectly even with screws tighten. These are small issues but they should not exist on a Geiger counter that cost almost 400 euros!

Berlin Zehlendorf 10/02/2021

What bothers me the most is that the standard model does NOT come with a speaker! In my opinion, a clicking sound should be a standard feature on EVERY modern, handheld Geiger counter. Even my cheap 30 euro DIY Geiger counter has a tiny speaker built-in. If you want audible clicking sound then you need to buy a more expensive Alert model.

Overall, I think that Gamma-Scout is a-OK Geiger-counter but it feels outdated and I find it to be overpriced. That is why I would not recommend the Gamma-Scout standard model and I would suggest looking at other meters from the competition. A good alternative that comes to my mind would be Radiascan 701.

DP-63-A: The Most Radioactive Geiger Counter

Ok, this one was on my to-do list for a very long period of time. Today I’ll show you the most radioactive Geiger counter the world has ever seen. Let’s take a closer look at the DP-63-A.

The DP-63-A is a high range Geiger counter designed to detect contamination after a nuclear attack or an accident. It has two measuring ranges, 1.5 R/h and 50 R/h. The 1.5 R/h range uses the upper scale and 50 R/h range uses the bottom scale. In order to take a measurement, we must hold the 1.5 R/h or 50 R/h button that is located on the right side. Holding both buttons at the same time will result in a circuit test. This unit is equipped with 2x Geiger Muller tubes, one for the lower range and the other for the higher. DP-63-A also has a beta window which allows measuring beta+gamma or gamma only. Since these are high range Geiger counters, I don’t think there are very practical, unless you are planning on going inside of CNPP reactor 4.

DP-63-A from 1965

These units were produced during the Cold war from 1958 until the 1970s. What makes them really interesting is the fact that the models produced from 1958 to 1966 used radium (Ra-226) paint on the scale. This was done in order to make the scale glow in the dark environment, however, it also resulted in the meter itself being extremely radioactive. Today the scale doesn’t glow at all even when light-up using a black light.

Very radioactive radium scale

It seems that there are two versions of the radioactive DP-63-A. The early models had little bit more radium paint on them making them “hotter”. Few years after the production has started, the amount of radium paint was reduced in order to make the DP-63-As “safer” but they were still stupidly radioactive! These two versions can be easily told apart. The “hotter” units have a year of production written on the front panel, while the less radioactive ones have only the serial number. My unit is the “hotter” one.

Units produced after 1966 used luminance paint but it wasn’t radioactive like on early units. Unfortunately, units without radium scale look almost identical to the units with less radium paint. This makes finding a DP-63-A with radium scale more challenging.

My first shot at getting DP-63-A with radium scale was unfortunately unsuccessful. Luckily I managed to return it and I started looking for another unit but with radium scale.

After some time, I found an auction with DP-63-A from 1965. I reached out to the seller and ask him if the unit was factory sealed. Unfortunately, it was opened by someone else in the past but I still decided to pull the trigger after I got a really good deal on it.

When the packaged arrived I immediately knew that I got a unit with a radium scale since my Geiger counter was screaming when it was anywhere near the box.

Radioactive package

After opening the box, I knew I had to remove the radium scale from the unit and put it into a lead pig for safety reasons before I could make a more detailed video on this Geiger counter.

Removing radium scale from DP-63-A

Although I removed all radioactive source, the unit was still radioactive. That was because radium 226 decays into radon 222 which is a gas, meaning the inside of the unit was heavily contaminated. I used a water sprayer in order to wash out as much contamination as I could. Unfortunately, radon decay products tend to “stick” to different surfaces which meant that even after a lot of decontaminating, the unit was still radioactive but luckily nowhere near the levels when I first opened it.

Inside of the unit, there are two Geiger Muller tubes but what is interesting, is the use of B-8 Strontium 90 Source (click here). You may ask why is there a check source right under Geiger-Muller tubes. Well, this is a great example of soviet engineering. If you look at the front scale you can see that the upper scale (1.5 R/h) has 0 in a different place than the lower scale (50 R/h). In order to compensate the 0 position, a strontium 90 was used to raise the needle slightly when using 1.5 R/h scales. The B-8 strontium 90 source reads around 1 mSv/h (1026 uSv/h) on the Terra-P when measured right next to SBM-20 GMT.

Strontium 90 source

Now, let’s talk about the other check source this unit has to offer, the DP-63-A’s legendary radium scale. On first glance, it doesn’t look like radium paint. It has a white, slightly creams colour while usually, radium paint has a brown/dark orange colour.

The layer of radium paint is very thick making the scale insanely radioactive. When measured with my Terra-P, the readings seemed to be around 3.5 mSv/h which is around 3500uSv/h of beta+gamma and gamma only was 420uSv/h! These are some very scary numbers. Just to give you some perspective, on average, a human receives 3-5 mSv/year from natural background radiation. Just for fun I also measured the scale with my Ludlum Model 3 with alpha/beta/gamma SBT-11A tube. Even though I was on the x100 scale, Ludlum got maxed out instantly at over 500 000 CPM.

In order to store this radium scale safely, I put it inside of a plastic bag which I then put inside of another plastic bag which I then put into a glass jar which I finally put inside of a lead pig container. The reason why I used a glass jar is to prevent radon 222 from leaking out. As the result, I managed to reduce gamma radiation from 420uSv/h to only around 8 uSv/h. I’ve also used the rule of inversed square law and placed the lead pig with radium scale as far away as possible. At a distance of one meter, the dose dropped to the normal background when measured with my RAYSID gamma scintillator/spectrometer (click here).

Overall, the only reason why I would recommend this Geiger counter to anyone is for its two, strong check sources. This being said, I highly discourage anyone from opening this unit or removing the radium scale since it is extremely dangerous!